I was out walking one day and found an old skateboard abandoned near my home and I decided to try restoring it to see what I might learn about how skateboards are actually made. Seeing as I didn’t know all that much about the parts of a skateboard, I first did some research on that. There’s lots of places online for this but I found YouTube videos to be the best way to learn about it.
Damage Limitation
Removing the old parts from the skateboard was actually harder than I thought, partly because it was so rusted and damp, but also because I probably didn’t have the right tools. I bought some basic skateboard tools in a local shop, along with some white vinegar to help de-rust some of the other parts, and I eventually managed to disassemble it fully. Gladly, I was able to salvage most of the parts, except the wheel bearings which were not designed to be opened so could not be reused. Instead, I used the bearings from a few spare fidget spinners that I had lying around and they actually did the job nicely.
Replacement Parts
Because the outer rims of the wheels were also badly worn (with large chunks missing), I decided to treat myself to a replacement set. I also bought a replacement grip tape as the old one did not come off the board in one piece. Apart from some art supplies (including primer, paint and varnish), these were the only replacement parts I had to buy.
Dampness Control
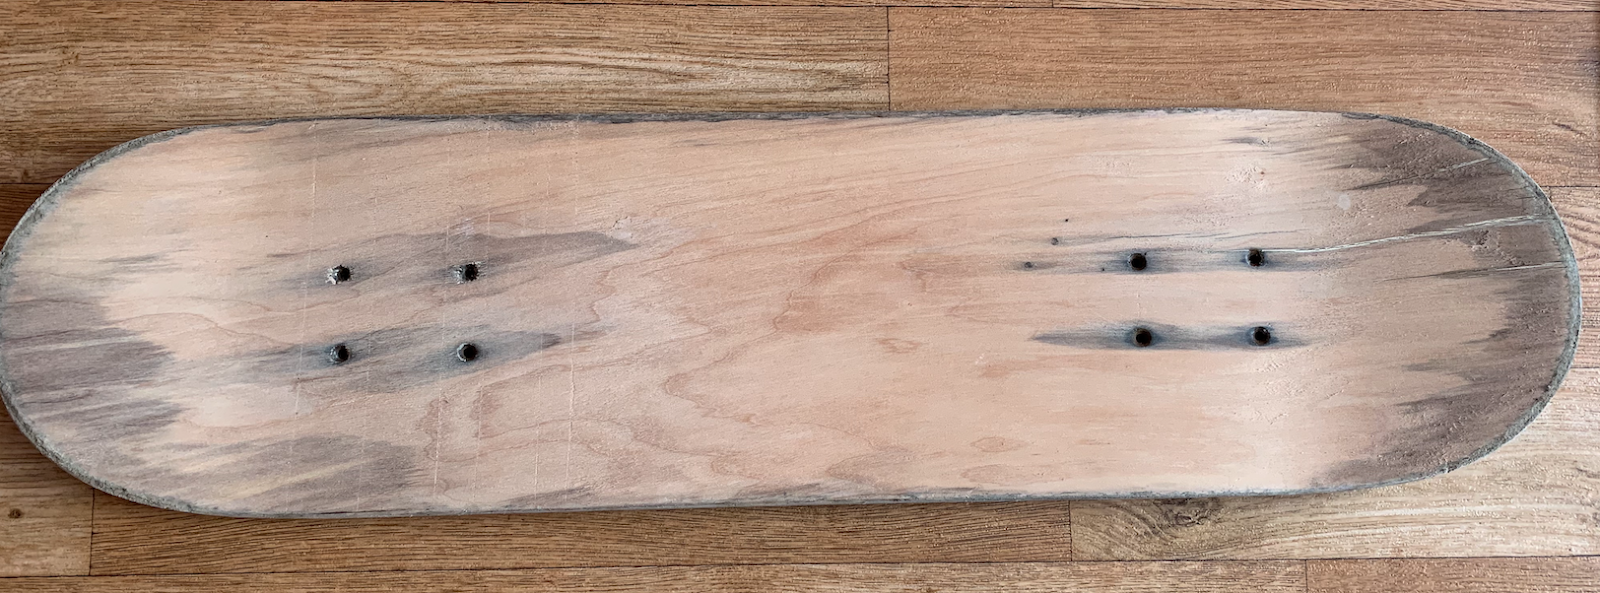
I tried sanding down the board but quickly realised that it was still very damp, from having been outside in the rain for so long. I did a little more research here and tried leaving the board in my hotpress for a couple of weeks. This didn’t really help all that much so I next tried leaving it in my Dad’s shed where he had a dehumidifier that keeps his old motorbike dry. This helped a lot more.
After trying to sand it by hand a couple times, which was very hard going, I took a trip to my uncle’s house to try out his electric sander. This made a big difference but he also had some white spirits and a heat gun in his garage which helped a lot too. Here is what it looked like at this stage.
Design Ideation
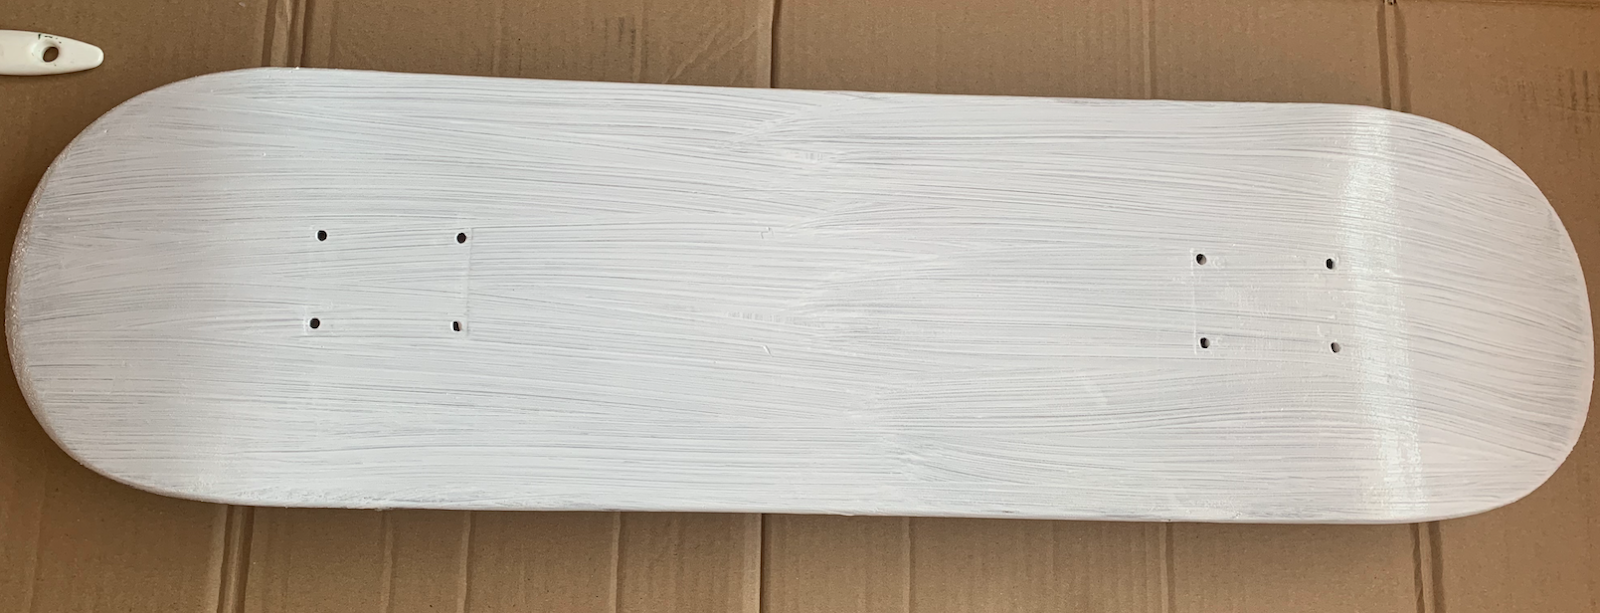
In the days and weeks while it was drying, I also began to think about what design I might like to put on it once it was finished. I knew I’d need a primer first because you can’t apply acrylic paints directly onto wood anyway and the primer would also shield the acrylic pains from any remaining dampness in the wood, which there was some. I actually ended up applying a total of 3 coats of primer before I was fully happy with the foundation for the next layer, after which it looked like this.
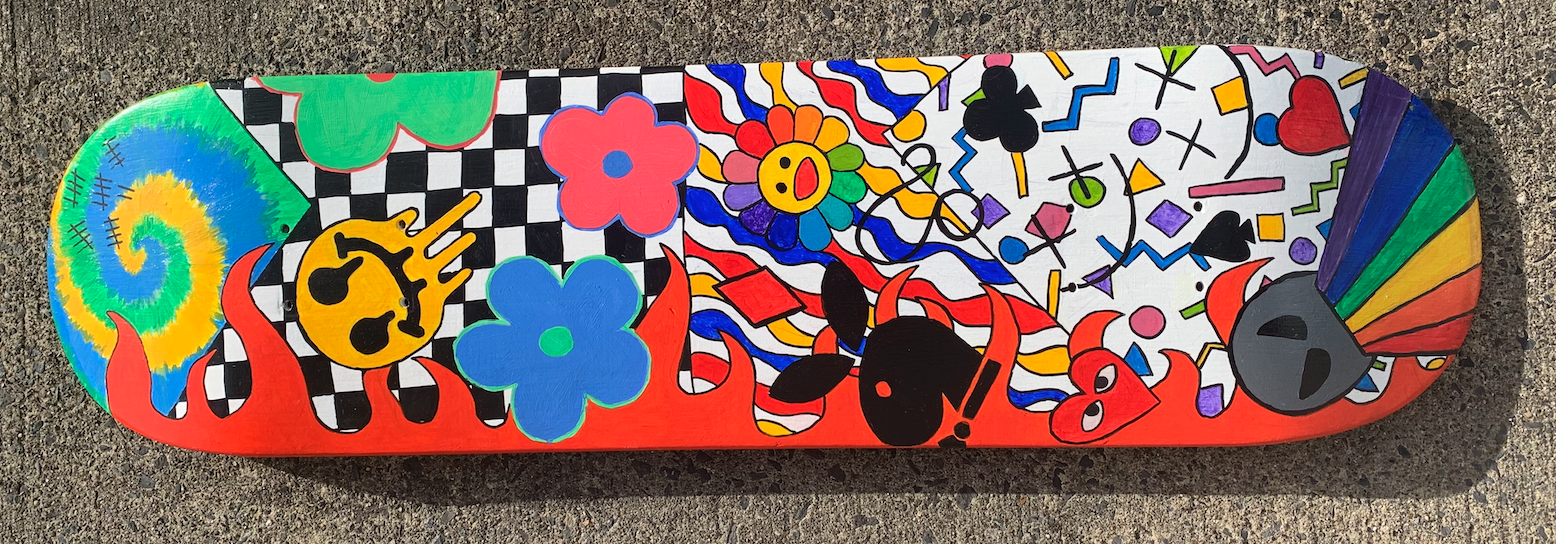
Painting My Design
The final stage (before reassembly), which was also the most enjoyable part for me, was to paint my design on the underside of the deck. I went with a mixture of different patterns and shapes, with strong colours, inspired from some ideas I saw on Pinterest. After some trial and error, I found a handy way to apply my design onto the deck using a B6 pencil with some A4 paper sheets and an iPad (where the design I was tracing was being displayed).
After tracing the design onto one side of the paper sheets (which were taped together), I turned over the pages and applied a heavy layer of dark pencil lead on the other side. I then flipped the page back over again and retraced my original design, which imprinted itself onto the deck via the lead layer underneath. I then applied the acrylic paint layer in the right places, after which I applied a few layers of varnish in the days after.
The Finishing Touches
In terms of reassembly, this started with applying a new grip tape. I wanted to put a design into this too and used a screwdriver to etch out my design as a pencil was too light. I then cut the tape into two halves and placed them on the deck, slightly apart, to get the effect I wanted. The reassembly finished with the installation of new trucks and wheels. Here is the finished product.
While it took a lot longer than I thought, I’m really pleased with the outcome and would definitely consider doing it again (hopefully in less time with all that I learned). If I do, I’ll be sure to add some details about them to my blog as well.
One thought on “Skateboard Restoration Project”
Comments are closed.