Producing a Vinyl EP

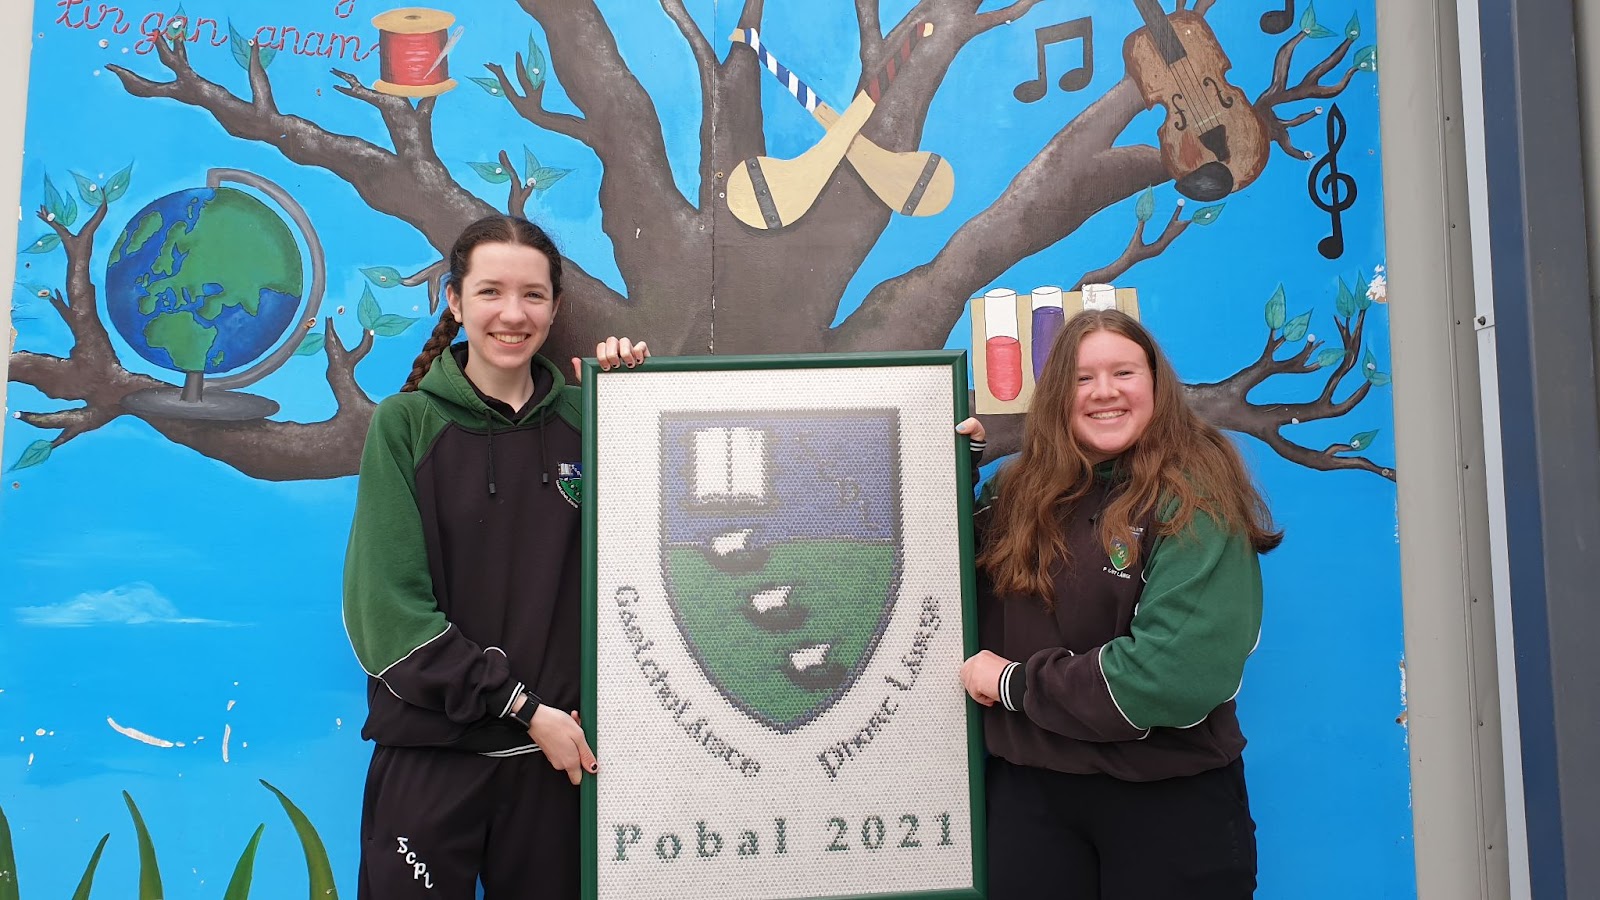
I created the music soundtrack for an Irish language short film (that won 3 national drama awards) earlier this year, which I worked on with my Dad. The idea for getting involved with this actually came from one of my former school teachers, who originally taught me to play the drums.

Being involved in this project was a lot of fun and, after we finished the music for the film, we wanted to find a way to say thanks to my teacher for their original idea. Because we had just published the songs as an online album, my Dad suggested that we see what it might take to have the same album pressed onto Vinyl as a gift for my teacher. This is the story of how we did this.

CopySmith.ie

The first thing we had to do was find a company that could produce vinyl albums. My Dad did some research online and decided to contact CopySmith.ie whose website seemed to offer what we needed for a price that seemed affordable for the quantities we wanted. We wanted to make just 3 copies: one for my teacher, one for myself and one for my Dad.

My Dad did most of the dealing with CopySmith and, while (he said) the ordering process was fairly low-tech (in comparison to publishing the album online using CD Baby), the service he got from them was really superb. The main person he dealt with was Adrian and he was really, really helpful all the time, especially with all our questions because this was our first time.

He provided templates for the album cover and record labels, answered emails at weekends and in the evenings and was really accommodating for any changes we needed to make. He also allowed us to send him trial versions of the artwork (to see if they were correct) before placing our order.

Based on what my Dad said, I think we’d definitely recommend CopySmith to others and I think he’s already done that with a few of his friends.

Vinyl EP

We had created four songs for the movie soundtrack and these were less than 5 minutes long in total. We also had other versions of each song (some longer and some without background sound effects) and those were around 4 minutes long too.

According to Adrian at CopySmith, this meant we could fit them onto a 7” record, so that’s what we ordered in the end. A 7” record with more than one song per side is known as an EP in the record industry, which stands for Extended Play.

Artwork Software

We needed to create artwork for the album cover (front and back) as well as for the labels for the two sides of the record. The artwork for each of these had to be a very specific resolution:

  • Album Cover: 2173 x 2173 pixels at 300 DPI (Dots Per Inch), which was around 18.4cm
  • Record Labels: 1122 x 1122 pixels at 300 DPI, which was around 9cm.

We tried lots of different free graphics software programs but very few of them did exactly what we wanted (especially the 300 DPI). In the end, we chose Adobe Spark because, even though it was not free, we felt it was the easiest to use and had lots of flexibility. We could also pay by the month and only needed it for one month, so it only cost €12.95 in the end, and was worth that.

Cover Design

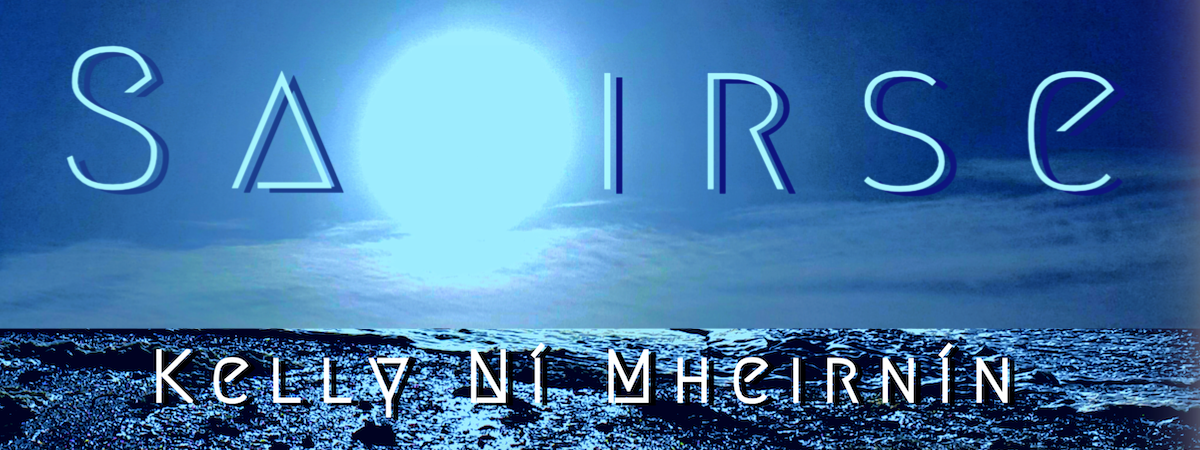
Because the music was written for a movie that was set by the sea (with a storm scene in it), we decided to design the album cover based around an ocean theme. My Dad had a few photos he’d taken at some local beaches earlier in the year and we chose to base the cover on one of those.

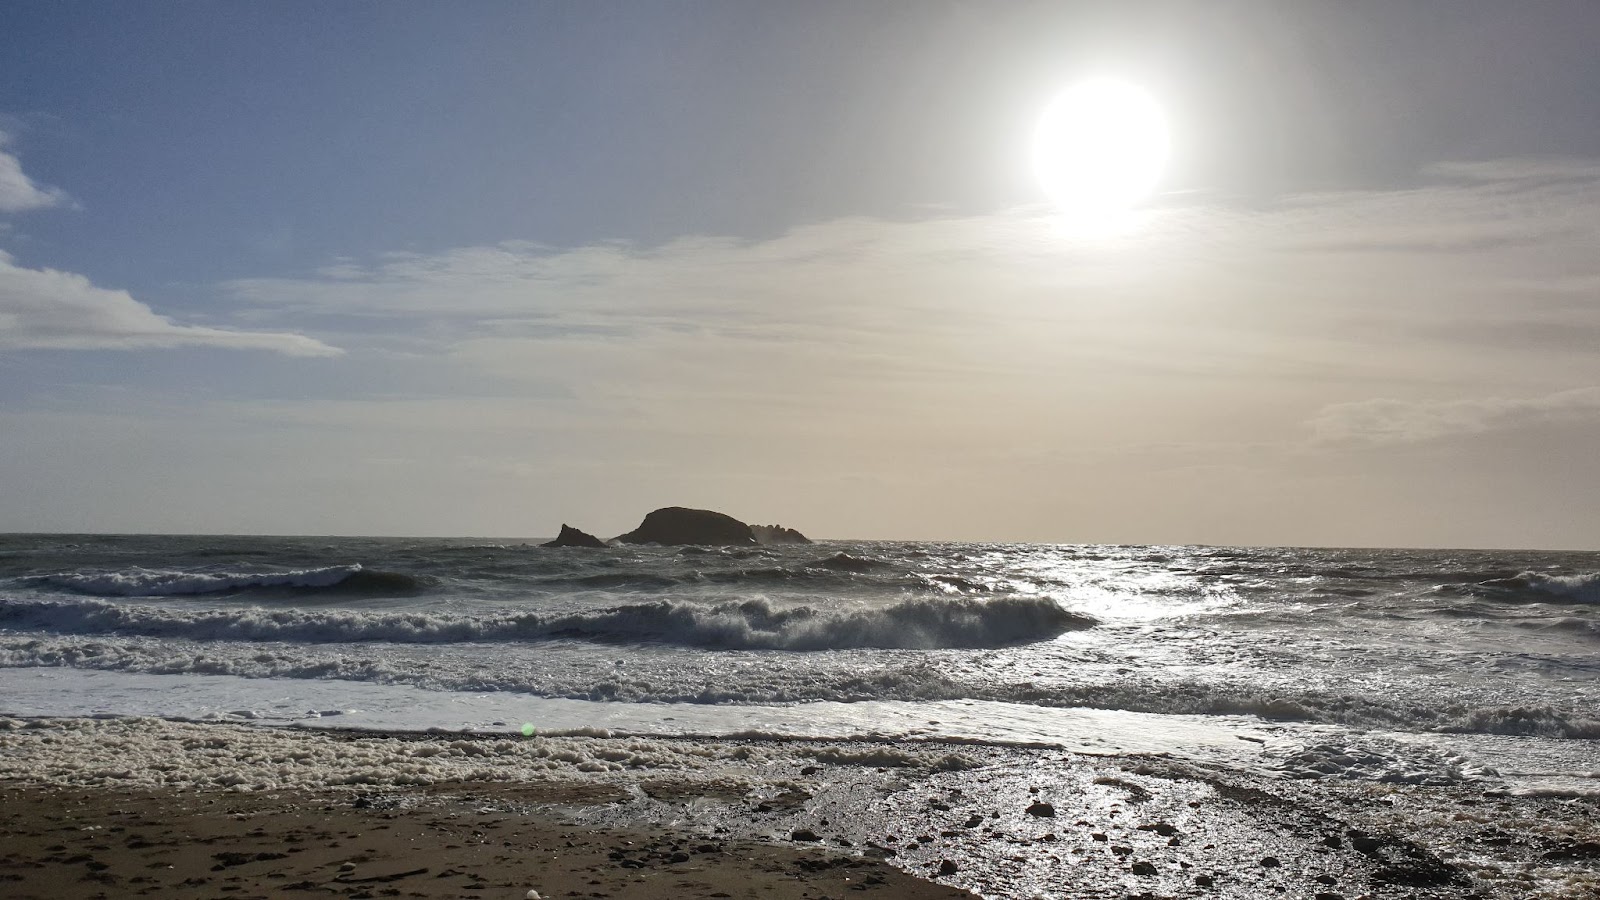
I then used Adobe Spark to crop sections of this photo for the front and back part of the cover, using some hue to create a blue, nighttime effect. We created separate Adobe Spark files for the front and back cover (we did the same of the labels later on). My Mam also suggested using the sun in the photo to form part of the album title: Saoirse (the Irish word for Freedom).

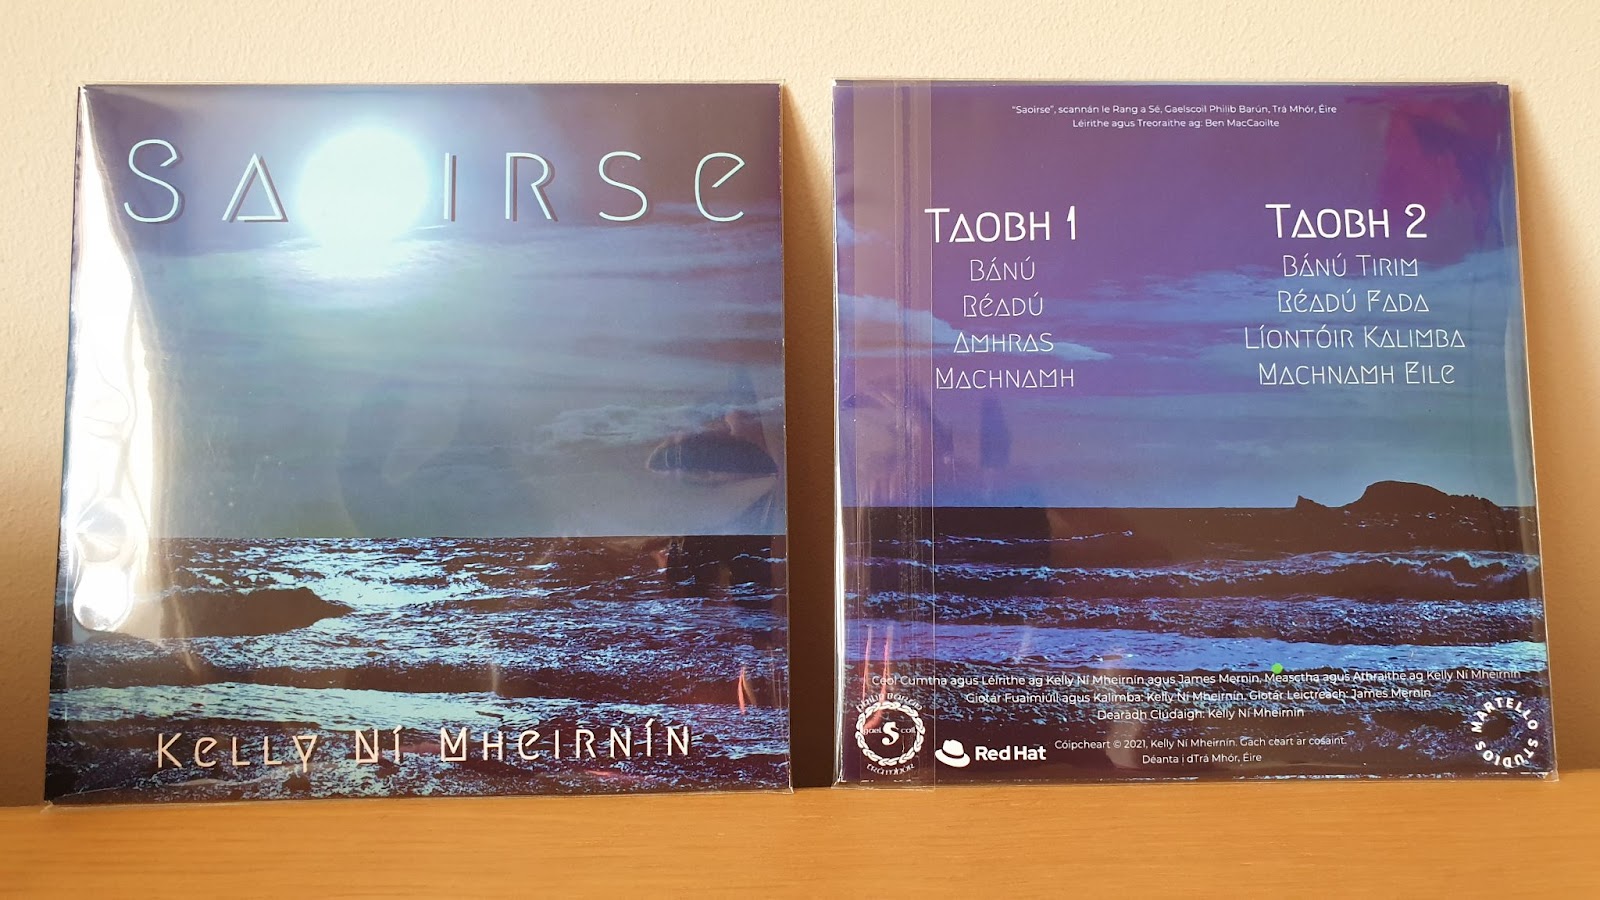
Once we had the basic background that we wanted, we added the other details to the front and back. The front just had the album title and my name but the back had lots more details, including the song names for both sides and various credits for the music and film creators etc.

We looked at a few of my Dad’s old singles to see what details we should put on the cover and, in the end, this is what we ended up with (the front is the left and the back is on the right):

Because the movie was in the Irish language (my former school is an Irish language school) and so were the names of the songs we created, we decided to use the Irish language for all of the album cover (and label) details as well.

Label Design

Once we had made the front and back cover, we knew a lot more about Adobe Spark so creating the labels for the record took less time. Adobe Spark had lots of different features and effects that we were able to use but it did take a little bit of trial and error to settle on the right amount of detail to include. Again, we used a few old singles for inspiration and eventually ended up with these:

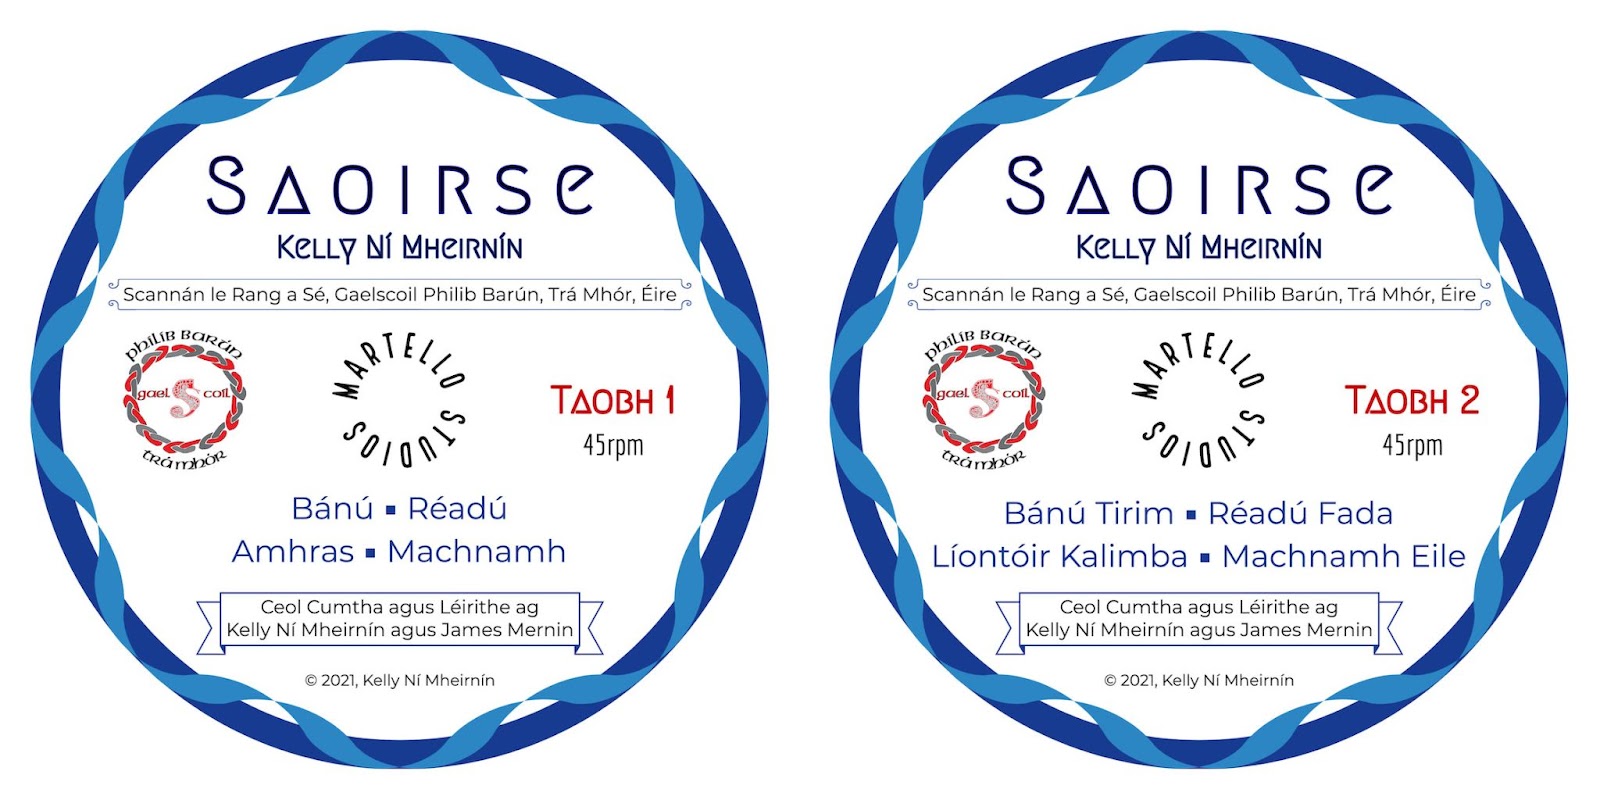
The lighter, blue ribbon effect around the edge is meant to look like ocean waves when the record is spinning on the player and our fake record company name, Martello Studios, is meant to spin around the hold in the centre of the record. These turned out really well too.

Music Files

We didn’t have to do anything to the music files we had, except give them special names when uploading them to the CopySmith website so the vinyl pressing company would know which song to put where, on each side of the record.

Summary

Once we finalised the artwork files, we uploaded them (along with the specially named music files) to the CopySmith website and formally placed our order (paying using Paypal). We were told that it could take 3-5 weeks before the records would be ready so you need to allow for this if you’re thinking of doing a project like this. Here is what the finished records looked like:

From start to finish, the entire effort took around 8 weeks but it was all worth it when we presented a copy to my former teacher who was absolutely blown away by it. We later found out that he is also a former DJ and is a huge fan of vinyl records (doesn’t even have a music streaming account), which made it extra special!

Publishing Music Online

After I finished creating my first movie soundtrack, which was part of an Irish language short film that later won 3 national drama awards, my Dad and I wondered what it might take to put the music we created onto Spotify, which we both use.

CD Baby

We found it a little tricky to understand how to do this at first, even after searching the Internet for quite a while, so my Dad asked an old school friend, Micko Roche, about it (who is also quite a successful music artist). He explained that you need to use an independent distributor to put your music online and he recommended that we try using CD Baby, which he ses and likes.

We checked out CD Baby and discovered that, for the same amount of effort (and cost), you can also publish your music to a bunch of other music platforms as well. These include Apple Music, Amazon Music, Deezer, Shazam, YouTube and lots of others.

Cost

Publishing an album costs $29 (for a standard album) and there was a one-off cost of $20 to set up a new UPC BarCode for our account, so the total cost was $49 which worked out at just over €40.

Timing

There are quite a few steps involved in getting an album published and because of the various stages (below), you should allow up to 2 weeks for everything to get done.

Album Creation

Publishing the album actually took a lot longer than we expected (around 1 hour in total) but the process was actually very easy to follow (there were just a lot of steps).

It starts with naming the album and the artist, along with uploading the artwork (which needs to be a specific size: 1400 x 1400 pixels). You then have to name all the songs, including saying who the composer and producer is for each track, as well as naming the author of the lyrics (if there are any) and saying who might own the copyright for any of the music you’ve used. This might seem like a lot but the CD Baby website is very well designed and it was quite easy to use for this part.

Once you have all of this done, you upload the music files themselves. The CD Baby website is quite clever here too because it spotted that our music was not in stereo (it was in mono because we recorded it using an iPhone). We were able to fix this in Audacity and got the stereo versions uploaded around 20 minutes later.

The final step was to select up to two genres for your album and to list other artists that you might sound like, but this step was optional.

Review Process

Once you submit your album with all the settings above, you need to wait for someone at CD Baby to review it (e.g. to ensure it matches the type of music you said in the genre). This can take up to one week to complete and, if you make any changes (e.g. rename a track), the review process needs to start all over again.

Distribution

Once your album has been reviewed, it is then sent out to all the digital music platforms to be released on them. Again, this can take a few days and we found that it appeared on Spotify first (after around 2 days) and then Apple Music 1-2 days after that.

While it took a bit longer than we expected and involved a lot of steps, it was actually a very process to follow and I’d definitely feel more confident doing it again in future, and you should too.

Saoirse: My Movie Soundtrack

While I was doing Transition Year at school, many of the things we would normally have done were not possible due to the Covid-19 pandemic restrictions. However, my former school asked me if I’d like to get involved in a STEM project they were doing, by recording the music soundtrack to a short film they were hoping to make.

The film was going to be called Saoirse (the Irish name for Freedom) so I used the same name for the music soundtrack as well. I also asked my Dad to help with the project so he played the electric guitar while I played my acoustic guitar.

A few people have since asked me how we did the soundtrack so I decided to write a little bit about that here.

Studio Setup

The first thing we had to do was sort out how we would record the music. We tried a couple of ways to do this, including using a Loop Pedal (Boss RC-2) and a USB Audio adapter connected to a Mac (with GarageBand). However, these proved to be a little too complicated for our needs and, in the end, we decided to just record the music using the Audio Recorder app on my iPhone, placed close to the amplifier.

Some of the first recording we did had a little bit of echo and background noise from the acoustic guitar strings so I faced the other way from the iPhone when playing and this helped a lot.

Music Equipment

We used the following equipment to play and record the music we created:

  • Acoustic Guitar: Epiphone PR5-E (Florentine Cutaway Electro Acoustic Guitar)
  • Electric Guitar: Epiphone SG-400 Vintage
  • Amplifier: Roland Cube Street
  • Smartphone: iPhone Xs

The guitars were both connected to the amplifier, which was placed in front of the iPhone to record.

Audacity

After we took the music off the Audio Recorder app (by uploading it to Dropbox) we trimmed some of it using the Audacity app on my Mac, which is free (and open source). Because the iPhone app only records in Mono we also had to convert the tracks to stereo using Audacity. This was a simple matter of duplicating the mono track and saving both tracks as a MP3 file.

We were also able to enter some song/track details into the MP3 file when exporting from Audacity, which made sure these appeared in iTunes/Music apps later on, which was handy.

Sound Effects

Some of the scenes in the movie were shot near a beach (and during a storm) so we also recorded some waves at our local beach (placing some socks over the phone to cut out the noise of the wind) and mixed this with the music we recorded. We did this mixing in Audacity too.

Song Names

Once the filming of the movie was underway, the teacher was able to tell us more about each of the scenes that would need some music. This helped us to name the songs, as follows:

  1. Banú (meaning Dawning) became the song for the opening scene, which shows a young girl walking on a beach. This track has some wave sound effects too.
  2. Réadú (meaning Realisation), which has some thunder sounds mixed in, was used during a storm scene.
  3. Amhras (meaning Doubt) was a short filler track between two scenes.
  4. Machanmh (meaning Reflection) was used during the closing credits.

Once the filming was finished and the editing process started, the teacher was also able to tell us how the music tracks needed to be. We made some adjustments to the chord (and sound effects) here to get the track lengths correct, once again using Audacity.

Summary

The finished movie was recently launched and actually won some awards in a national school drama competition

While it took a while to compose and record all the music, and we had to do a lot of takes to get versions of each song that we liked (and that were the right length for the film), we were really happy with the results, especially when we finally got to see them in the finished movie.

I learned a lot about music production and editing too, which was quite interesting and I’d definitely recommend using Audacity for this as it’s very flexible and easy to use.

A Transitional Year

In Ireland, there are two main state exams that you take during your secondary school years. The Junior Certificate comes first and is a 3-year cycle that you complete at around 14-15 years of age. You then complete the Leaving Certificate, which takes 2 years. Students also have an option to spend one additional year in between these two cycles, exploring a range of different social and personal development activities and experiences. This is called Transition Year, or just TY.

Some of the highlights of a normal TY would include going on work experience, doing some community service, taking a trip abroad and generally spending a lot of time outside the classroom. However, our year was very different due to Covid-19 and we were unable to do any of these.

That is not to say we did nothing (far from it) and as we are about to finish TY soon, I decided to take a look back at what I achieved over this very different year. I’ve separated the various items into categories to make them easier to read.

Technology Projects

I did a number of projects that involved using various kinds of technology, which were:

  1. I produced Digital Mosaic Posters for my current and former schools, which involved taking headshots of all pupils and teachers and using a computer program to create a mosaic image of the school crest, then mounting this in a frame.
  2. I started my own blog in 2020 (using the popular WordPress blogging software) and decided to write one new article each month during Transition Year. In fact, the one you’re reading now is the final one in this series!
  3. My friends and I submitted an idea to the BT Young Scientist Award, which was a project that would explore the effects of wearing face masks in school.
  4. I recorded a Podcast, which was a fake interview with a celebrity. I chose to interview Tom Holland and asked him different questions on a range of topics.
  5. I created an online computer game using Scratch, based on the Apex Legends video game.
  6. We learned how to use Solidworks, a popular Computer Aided Design (CAD) software package, and created a basic LEGO Car and small Park Bench.

Music & Art

I also did some projects (personal and school-based) with a musical and artist theme, including:

  1. I was invited (by a former primary school teacher) to compose the soundtrack for an Irish language short film they were producing, which I did with my Dad. In total, we wrote, arranged and recorded 7 tracks, including adding sound effects using Audacity.
  2. I completed a week-long, creative song writing course with Music Generation, Waterford.
  3. I restored an old skateboard, replacing many of its parts and designing my own artwork for it. I also wrote a blog about how I did this.
  4. I created and delivered a presentation about an entrepreneur that I admire, and chose to base it on Stan Lee, the creator of the Marvel comics and movies.

Environmental

I took the opportunity to do some activities related to the environment as well, which were:

  1. I joined Tramore Tidy Towns to help clean our local beach every Sunday morning.
  2. I was selected to join the Green Schools Committee, helping with various related activities during the school year (including several Covid safety initiatives).

Practical Skills

I decided to try learning some new skills during the year, including:

  1. I prepared myself to sit the Driver Theory Test, which involved practising lots of sample questions using a computer program at home. I applied to sit the real test too but my test date was postponed due to Covid-19, so I am still waiting to finish this.
  2. I took a number of cookery & baking classes at school and made several meals and dishes at home throughout the year. I plan to continue with these as my younger brother and Dad have fallen in love with my brownies!

Sport & Recreation

The school arranged lots of different sporting and recreational activities during the year. These included surfing, cycling (on the Waterford Greenway), walking (on the Suir Blueway and Dunmore East cliffs), as well as Archery & Climbing (at the Dunmore East Adventure Centre).

Online Learning

I also completed a range of different courses online, which included Road Safety (e.g. drink and drug driving, fatigue, cyclists and distractions), Concussion & Covid Safety, creating an education course on skateboard design and skills, presentations skills and using Microsoft Teams.

We attended a number of University Open Days too, which were very informative and helpful.

Reflections

While the year was very different to what I expected and I definitely would have loved to do some work experience and take a trip abroad with my friends, I still feel that I have learned a lot. I would definitely recommend that everyone should do Transition Year if they get the chance to.

Digital Mosaic Posters

My friend and I created some posters for Gaelscoil Philib Barún and Gaelcholáiste Phort Láirge recently (my former and current schools) as part of my Transition Year technology class. The posters are rather different and take the form of a large (A1-size) mosaic image of the school crest with an Irish-language caption underneath.

The mosaic images are quite unique and personalised because the tiles within the are actually miniature, pixelated photographs of each child and teacher at the schools during the 2020-2021 school year. Viewing the posters is quite fun too because they look a little grainy from a distance but then, as you walk closer to them, you see the people’s faces come into focus.

Gaelscoil Philib Barún

The poster for Gaelscoil Philib Barún consisted of the school crest, which is mostly red and black in colour (with a little grey) and the caption “Daltaí 2020” underneath, which means “Pupils 2020”. The poster was mounted in a red frame with a perspex front cover to protect it.

The school already had a similar poster from 2012 and we helped them make a fresh copy of that too, so that both posters are the same size and in similar frames. Both of them are now on display at the school and my work was also featured on their school website here.

Gaelcholoáiste Phort Láirge

The poster for Gaelcholoáiste Phort Láirge also consisted of the school crest, which is mostly green and blue (with a little black) and the caption “Pobal 2021” underneath, which means “Community 2021”. We chose the term community because some of the teachers were in it too. The poster was also mounted in a green frame with a perspex front cover to protect it as it may be mounted outdoors.

This was the first time the school did anything like this and they are planning to use the same mosaic image as the front cover of the new school handbook next year.  The poster will be displayed near the school entrance so that visitors can enjoy it also.

Digital Mosaic Generation

The posters were created by a computer program called Turbo Mosaic (available for Mac and Windows). This is free for smaller posters but we bought the advanced copy to make the larger posters that the school wanted.

All you need to do is supply it with the headshot photos of the pupils (and teachers), along with the photo that you want to make a mosaic of, and it will do the rest. It took a while to get all of the settings right (e.g. image resolution, number and shape of tiles, colourisation) but once we did this for the first one, we were able to reuse the same settings for the second one.

You should try to get some of the colours from the school crest into the headshot photos so the software can use them to create a more realistic version of the crest. You also need to pick a good quality frame too so it will last for several years in a school setting, where it could easily get damaged.

These were fun projects to work on (especially taking the headshots at my school) and people seem to really enjoy trying to find themselves in the posters. I’d definitely do it again in future.

Apex Legends Online Quiz

I started playing the Apex Legends online game a few months ago and really liked it. Then, around the same time, a friend of mine showed me the Pottermore Quiz, which asks you questions and tells you which Hogwarts House you would fit into best. I thought that game was a bit of fun and wondered if there was something like it for Apex Legends. I had a look on the Internet and there weren’t really any quizzes or games so I decided to try making my own one.

Using Scratch

I had a look around at some ways to create games and then remembered the Guitar Trainer game that I created at CoderDojo a few years earlier, which was written in Scratch (a popular tool that is used to introduce kids to coding). I liked working with Scratch before because it was very easy to use and understand so I decided to use it again for my Apex Legends game.

Game Setup

The basic idea of my game was to ask people 10 questions about their experiences, skills and achievements while playing the Apex Legends game and, based on their answers, give them a performance rating (in a similar way to  how the Pottermore game assigned you to a house).

I asked my Dad for some tips on how to set up the game and he suggested that I store all of the questions in a List and set all of the basic game controls in Variables so I could easily change the game behaviour later on, just by changing these variables.

This worked out really well later on as I had to do quite a bit of testing and debugging, while getting some of the other features to work, and I think it’s a good idea to do this all the time.

Scoring Mechanism

At first, I set up the game so people could type in their answers to each question. However, when I tried to figure out how to calculate their score, it was too hard to do based on the number of different ways people could answer the questions.

I chatted with my Dad again and he suggested that I look more closely at other games and see if I could spot a pattern in how the scoring worked. I eventually noticed that most other games were using a multiple choice method for answering the questions and were probably assigning a score to each question choice, which could probably be used to base the final rating on.

I therefore decided to rephrase all my questions so that the answers would be a Yes or No, and I gave the person a score of 10 if they picked Yes and a score of 0 if they picked No. As they answered each question, I kept track of the score they were getting and I then wrote a part of the program that would give them a rating based on their final score.

Random Questions

When I was testing the game, I adjusted one of the variables I mentioned earlier (which controls how many questions are asked) so it only asked 3 questions (instead of 10). This made testing a little easier. However, I noticed that it was always asking me the same questions in the same order and I wondered whether people might try to share their answers and cheat.

A little more reading on the Scratch Wiki showed me that there’s a Random feature so I decided to use that to get the game to ask the questions in a random order. This was fairly hard to figure out but I got there in the end and was glad I got it working because it’s kind of cool now.

Adding Music

I had seen a few other Scratch games that had background music in them so I decided to try adding this too. This is done using the Sound feature in Scratch. All you need to get it working is an MP3 file so I went to one of the Apex Legends videos on YouTube and used an online video converter to get the music from the video into MP3 format, and then used that in Scratch.

Restart Feature

While trying to test the game, using various different answers to make sure it gave me the correct legend rating (for the score I’d gotten), I found it a little annoying to have to stop and reload the Scratch game every time. I decided to try adding a way to restart the game at the end to see how that might work out. It was actually really hard to do because I had to reset a bunch of variables (including the final score and the list of questions) but, looking back, it was definitely easier to do in the end because I was storing all of the game setup in variables.

The Finished Product

All in all, it took me a couple of weeks to write the game that’s now available to play here on the Scratch website. Here is what it looks like and I hope you enjoy playing as much as I enjoyed creating it.

I think Scratch is really good for these kinds of games and much more powerful than I thought. It’s very easy to use for most levels of coding and really easy to debug when something goes wrong. I’d definitely recommend that you give it a try and there are lots and lots of sample games online that you can use for inspiration and help. I especially like the fact that you can choose a game you like and then look inside it to see how it works. I learned a lot by doing that, and think you will too!

Status Pages for Online Games

I was using Xbox Live one evening and when I tried to invite my friends to an Xbox Live Party, it did not work. I knew they were already online because they had just told me via text, but yet the Xbox said they were offline and I could not hear them talking when they joined the party.

I restarted the Xbox, checked my Internet connection (both on the Xbox and using my phone) and asked my friends if they were having any similar issues, which they were. Once I discovered that, I knew the fault wasn’t on just my Xbox or on my home Internet connection. 

As I quickly ran out of ideas for what else to try, I decided to ask my Dad for help. This is sometimes a risky strategy as his answers tend to go into some detail, especially when it comes to technology and the Internet 🙂

He told me about something called a “status website” (which I had never heard of before) where companies publish up-to-date information about any issues they are having on their systems or networks. To my surprise (and relief), we found one for the Xbox Live service and it turned out they were, in fact, having a problem at that very moment, so I duly called off the search for the mystery problems I was having.

We then went in search of other status websites and found some for other games I play too. It looks like some companies also use a dedicated Twitter account to publish status updates. Here are some of the others that we found:

So, if you’re having issues playing online games or using any other gaming console apps, have a look and see if the company has a status website and you might save yourself some time and stress thinking there’s a problem elsewhere.

iPhone 6s versus Samsung Galaxy A40

I’ve been using an Android phone (Samsung Galaxy A40) for the past year or so, having used a couple of different Apple devices (iPod Touch 5 and iPhone 6s) for 2-3 years before that. The main reason I switched to Android was because the price of the iPhone I wanted (iPhone 8) was more than double that of the Samsung phone, and because the specs seemed pretty similar, I decided to give it a try.

However, now that Apple has launched a new iPhone SE, I’m wondering if it might be worth switching back soon, so I got thinking about comparing the two types of phones I’ve been using to see if that might help me decide.

While this comparison is based on just two specific phones (instead of all Apple phones versus all Android phones) and the iPhone 6s is now quite old (and quite slow), I still hope it might be helpful for anyone trying to decide whether the pay the extra for an Apple phone or not, which is what I was trying to do last year and am trying to do again now.

I’ve divided the comparison into different categories too, so people interested in different things about the phones might find this more helpful. I’ve also given some items that I care more about two stars instead of one.

General

Feature6sA40
Look & Feel (incl. icon design, shortcuts)
I personally prefer the layout and the design of the apps/icons on the iPhone 6s a lot more.
⭐⭐
Most Stylish
I personally think the exterior design on the iPhone 6s is a lot better.
Screen Size
The screen size on the Samsung A40 is a lot bigger.
⭐⭐
Battery Life
The battery life on the Samsung A40 lasts a very long time whereas the iPhone dies in less than an hour.
Screen Recording
The Samsung A40 did not have any screen recording features.
⭐⭐
Value for Money
The Samsung A40 is a lot cheaper but is still a brilliant phone.
⭐⭐
Wake-up Speed
The wakeup speed on the iPhone is much faster.

If you’re someone who is looking for a stylish, general purpose phone (and are able to pay more), then choose an Apple phone. However, if you’re someone who will take lots of photos and needs lots of storage with a good battery life, for a cheaper price, I would recommend an Android phone.

Accessories

Feature6sA40
AirPod Integration (incl. Battery Life, Pause, Siri)
On the iPhone you can see the battery life etc. of the AirPods, but you can’t on the Samsung A40. 
Phone Cover Selection (in shops)
Shops are always full of iPhone covers, in particular iPhone 6-10 and it’s very rare that you see a great selection of Samsung phones, especially the Samsung A40.

I know you can get accessories for lots of Android phones but, based on my experience in most phone shops I’ve been to, there’s always a better selection of accessories for Apple phones.

Camera

Feature6sA40
Face (selfie) Camera
I thought the selfie camera on the iPhone was a lot clearer and the colour was more saturated on it.
Widescreen Photos
For some reason the iPhone 6s never did widescreen photos whereas the Samsung A40 has multiple widescreen photo choices.
⭐⭐
Front-facing Camera
The front facing camera on the Samsung is a lot clearer and can capture colour and details a lot better.
Burst Mode Camera Speed
The burst mode speed on the camera is a lot faster on the iPhone and it starts a lot quicker when you press the button.

It was hard to decide which camera options I prefer, although I definitely like having widescreen photos because I look at them on my laptop and TV a lot (which are widescreen too). I could definitely see a big difference here based on the age of the phone too, so maybe a comparison with a newer iPhone would have been different.

Apps

Feature6sA40
Selection of Apps
I think that the selection of apps on both phones are the same because sometimes there won’t be a phone in the Play Store but at the same time there won’t be other apps available in the App Store.
Free App Purchasing Experience
There are more steps to purchasing an app from the App Store and it’s a lot easier in the Play Store.
App Install Experience (can see it downloading sooner)
I like the way you can see the apps as their downloading and how much is left to download on the iPhone.

Most apps are available for both iOS and Android and while there are small differences here and there, I think I prefer how apps are installed and managed on Apple phones.

Storage

Feature6sA40
External (Expandable) Storage
You can expand the storage on the Samsung A40 and it also has a lot more than the iPhone to begin with even though it’s a lot cheaper.
General Storage Consumption
The iPhones general storage takes up a huge amount of the space on the phone and it’s very difficult to reduce.

Apple phones don’t allow you to add any extra storage and the iOS system files seem to take up much more space, so if you think you will be storing lots of things on your phone, then Android phones are definitely a better choice here.

Security

Feature6sA40
Thumb Print Sensor Location
The thumbprint placement on the iPhone is a lot easier to access and makes it faster to open the phone.
⭐⭐
Face Recognition
There is face recognition on the Samsung A40 which is useful when you want to open your phone quickly or unlock your friends phone while they are sleeping 😉

Both types of phones have good security features so there’s little to separate them here.

Conclusion

I can definitely see why some people prefer Apple over Samsung, or the other way around, but if I had the choice (and won the lotto in the morning), I think I still prefer Apple phones (sorry, Dad!) because they’re just a little nicer to look at and that little bit easier to use.